Specifications
Specifications
Weight Capacity: 100 kg
Hanging Length: 120-160 cm
Swing Length: 150 cm
Swing Width: 55 cm
Padded Tube Diameter: 2.5 cm
Suspension Rope: 10 mm Thickness
Appropriate Age: 3+ Years
Package Includes
Canoe Nest Swing with Adjustable Ropes
Note: Stand not included. Any stands pictured are for perspective only.
Shaped like a boat/canoe and measuring 150 cm long, this is a unique swing that is great fun to sit inside and play with a friend.
The material is strong, smooth, and weatherproof, supporting up to 100 kg total weight, so it can seat more than one child.
The inner tubing is padded for comfort and safety, as pictured in the photo showing the swing before assembly.
For hanging, you should affix it to 2 hanging points such as using 2 tree straps and hanging from a sufficiently strong tree branch. Alternatively, you could hang from 2 hooks such as on a play set.
To hang from a tree, you should
- Choose a strong branch.
- Attach both tree straps so that the swing will move only forwards and backwards. If you use only 1 tree strap, the swing will spin.
- Adjust the ropes, so the swing is at a safe height, to minimize fall risk.
- Check that the area below the swing is safe from dangerous objects (sticks, bicycles etc.) or hard surfaces (cement etc.).
- Test the set-up before handing it over to the kids.
- The swing is now ready to play. Invite some friends over, as they're all sure to enjoy it.
Optional Accessories
Ceiling Anchor Plate Kit: Single
For use in concrete, brick or wood, this anchor plate kit is designed with ceilings in mind. It uses 4 sleeve anchor expansion bolts when used in concrete or brick, or 4 wood screws when used in wood for a sturdy hold. It then uses a carabiner and strap with 6 loops for selecting the desired hanging height.
The anchor plate is a good option when you want something more solid than a screw hook or tree strap, or when you need to install in concrete or brick (which some hooks won't allow). Setup is easy enough if you know how to use the expansion bolts or wood screws:
Installation in Concrete or Brick
The 4 expansion bolts (sleeve anchors) are specifically designed for use in concrete or brick.
- Mark out 4 holes positioned correctly for the anchor plate.
- Drill the holes with a hammer drill, with depth and width to fit the sleeve anchors inside.
- Clean the hole of dust using a vacuum, blower or brush.
- Position the anchor plate in place.
- Slide or tap the sleeve anchors in, then tighten the nuts sufficiently so that the sleeve expands, tightening itself in the hole.
For further instructions for installing in concrete or brick, see below:

Installation in Wood
Important: Do not use the expansion bolts in wood. It could split the wood, and will not be as strong as wood screws. Please only use the wood screws when installing in wood.
- Mark out 4 holes positioned correctly for the anchor plate.
- Drill pilot holes (to help to avoid wood splitting).
- Position the anchor plate in place.
- Drive in the screws.
Now you have your anchor plate in place, so you can attach your strap by passing it through the metal ring, then passing it through itself. Now attach the carabiner at the desired height and attach the swing of your choice. Have an adult check the strength of the set-up before use.
Specifications
| Weight Capacity |
100 kg Each |
| Anchor Plate Diameter |
12 cm |
| What's Included |
1x Anchor Plate, 4x Expansion Bolts, 4x Wood Screws, 1x Carabiner and 1x Adjustment Strap (110 cm) |
| Purchase Protection |
6 Months |
| Support |
7 Days per Week |
Swing Tree Straps: Pair
Quick Summary
- Strong with 200 kg Capacity Each
- Length: 120 cm
- Width: 4 cm
- Comes as a Pair of Straps
These tree straps are specifically designed for use with swings. You can hang with 1 strap and have the swing swivel, or you can use 2 straps to decrease spinning. They're easy to set up and strong too, so your kids can be swinging within minutes. You simply pass the strap over a strong branch, then loop the strap through itself. Just have an adult test the straps set-up before use.
Specifications
| Weight Capacity |
200 kg Each |
| Length |
120 cm |
| Width |
4 cm |
| Color |
Black |
| What's Included |
2 Tree Straps with Swivels and Carabiners |
| Purchase Protection |
6 Months |
| Support |
7 Days per Week |
Sensory Swing Frequently Asked Questions
- How much does a sensory swing cost?
-
How to buy a sensory swing?
- How much does the shipping cost for sensory swing?
- How to assemble a sensory swing?
- How to install a sensory swing??
- Are sensory swing safe?
How to assemble a sensory swing?
- Make sure all the necessary parts are complete.
- Remove the inflatable cushion from the vacuum-sealed bag.
- Open the pod swing zip and put the inflatable cushion inside.
- Connect the air pump to the inflatable cushion and pump it up.
Please note: Find the right balance of how you pump the cushion. Make it to the level of how the child is comfortable while sitting in it.
- Close the zip and make sure the zip is completely closed up to the seat.
- Put together the sensory swing seat and cushion.
How to install a sensory swing?
There are a few ways on how to install your sensory swing indoors:
Connect the hanging screw hook to the ceiling
- Connecting the hanging screw hooks
- Find a joist in your ceiling
It's much better if you have a stud finder tool, so you can easily locate the joist.
What to do if you don't have a stud finder?

A quick tip: Knocking the ceiling. If your knocking sounds solid, then it must be one of your joists. If it's hollow it isn't. Try another direction of your ceiling. Majority of the joists only direct in one direction.
Now you've located the joist, you can start to locate anywhere from those joists you're planning to hang the sensory swing seat at.
3. Installing your sensory swing
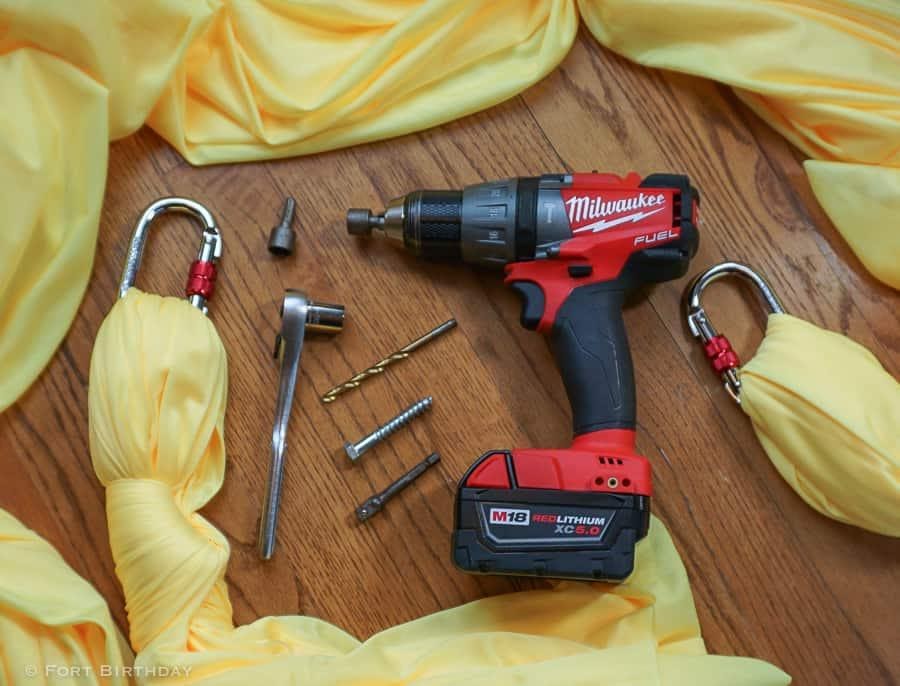
Equipment you need:

4. Draw the hole location

- Use the ceiling hanging kit to measure where you can drill the holes. Mark its holes with a pencil.
Please note: The majority of the joists are in different sizes so some are not wide enough to drill those four bolts.
Solution: Drill at least 2 blots along the joist. Sometimes, two bolts will be enough to support the seat.
- Using the drill, drill into the joist where the pencil markings are. Drill each hole.
- Clean out the drill using a vacuum, brush, or blowing into the bits. Always use a protective face shield, sunglasses to protect your eyes and not get dust in them.
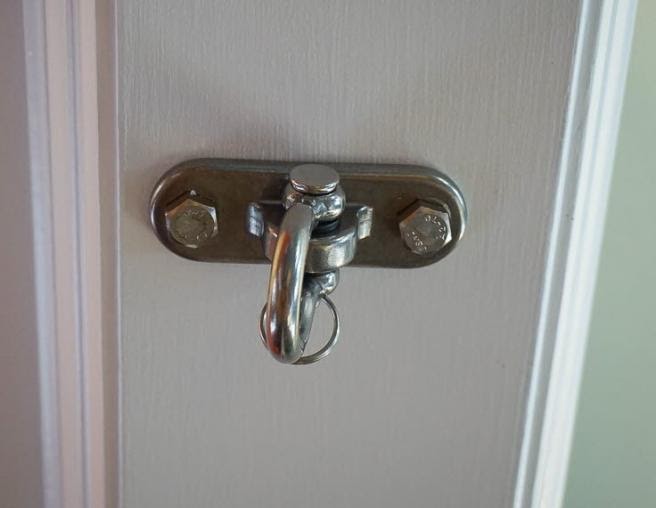
- Insert the hook into the hole and screw the bolts through the ceiling hook.
- Tighten all the bolts using a screwdriver.

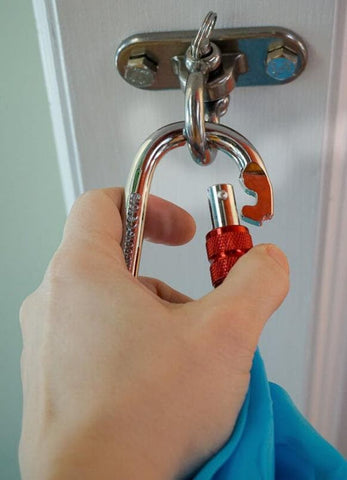
- Connect the carabiner to the sensory swing hook that’s already installed.
- If it’s too high from the ground, you can use a hanging chain kit to extend the seat lower to the floor.

Are sensory swings safe?

- Test the weight of the sensory swing for safety
- Hanging Sensory swing Safety instructions
- Test the weight of the sensory swing for safety
Before your child/children use the swing, pull it down as hard as you can to ensure that it’s installed correctly and can carry your child, if there’s no issue, let your child play away!
Hanging Safety Instructions

- An ideal safety precaution for hanging sensory swing is to put a mat under the sensory swing in case the child falls so it'll not result in any serious injury to the user.
- It's a must that the distance from the ground should not be more than 35cm.
- All sensory swings are ideal for gentle swinging only and not for strong swinging.
- Always keep the area from where the sensory swing is installed free from dangerous objects such as toys on the ground, or any other object that might cause tripped over, or a nearby object that can bump the sensory swing.
- We require adult supervision.
Additional information for adults to instruct children to:
- Dress appropriately while using the swing
- Avoid ponchos, scarves, and any loose-fitting clothing that are potentially hazardous
- Ask your child to sit in the center with full weight when swinging alone
Additional important information for adults to instruct children NOT to:
- Walk close to, in front of, behind, or between moving items.
- Get on/off the swing while it's still in motion
- Attach any hard objects or items to the swing.